DIY Herb Garden Pots
I’ve been wanting to set up a little herb garden on my bay window shelf in the kitchen since we moved in. I finally got the stuff together and after a little research, some trial and error plus a lot of praying my project wouldn’t end up on some Pinterest fail page, I’m finished! And loved the result.
Materials:
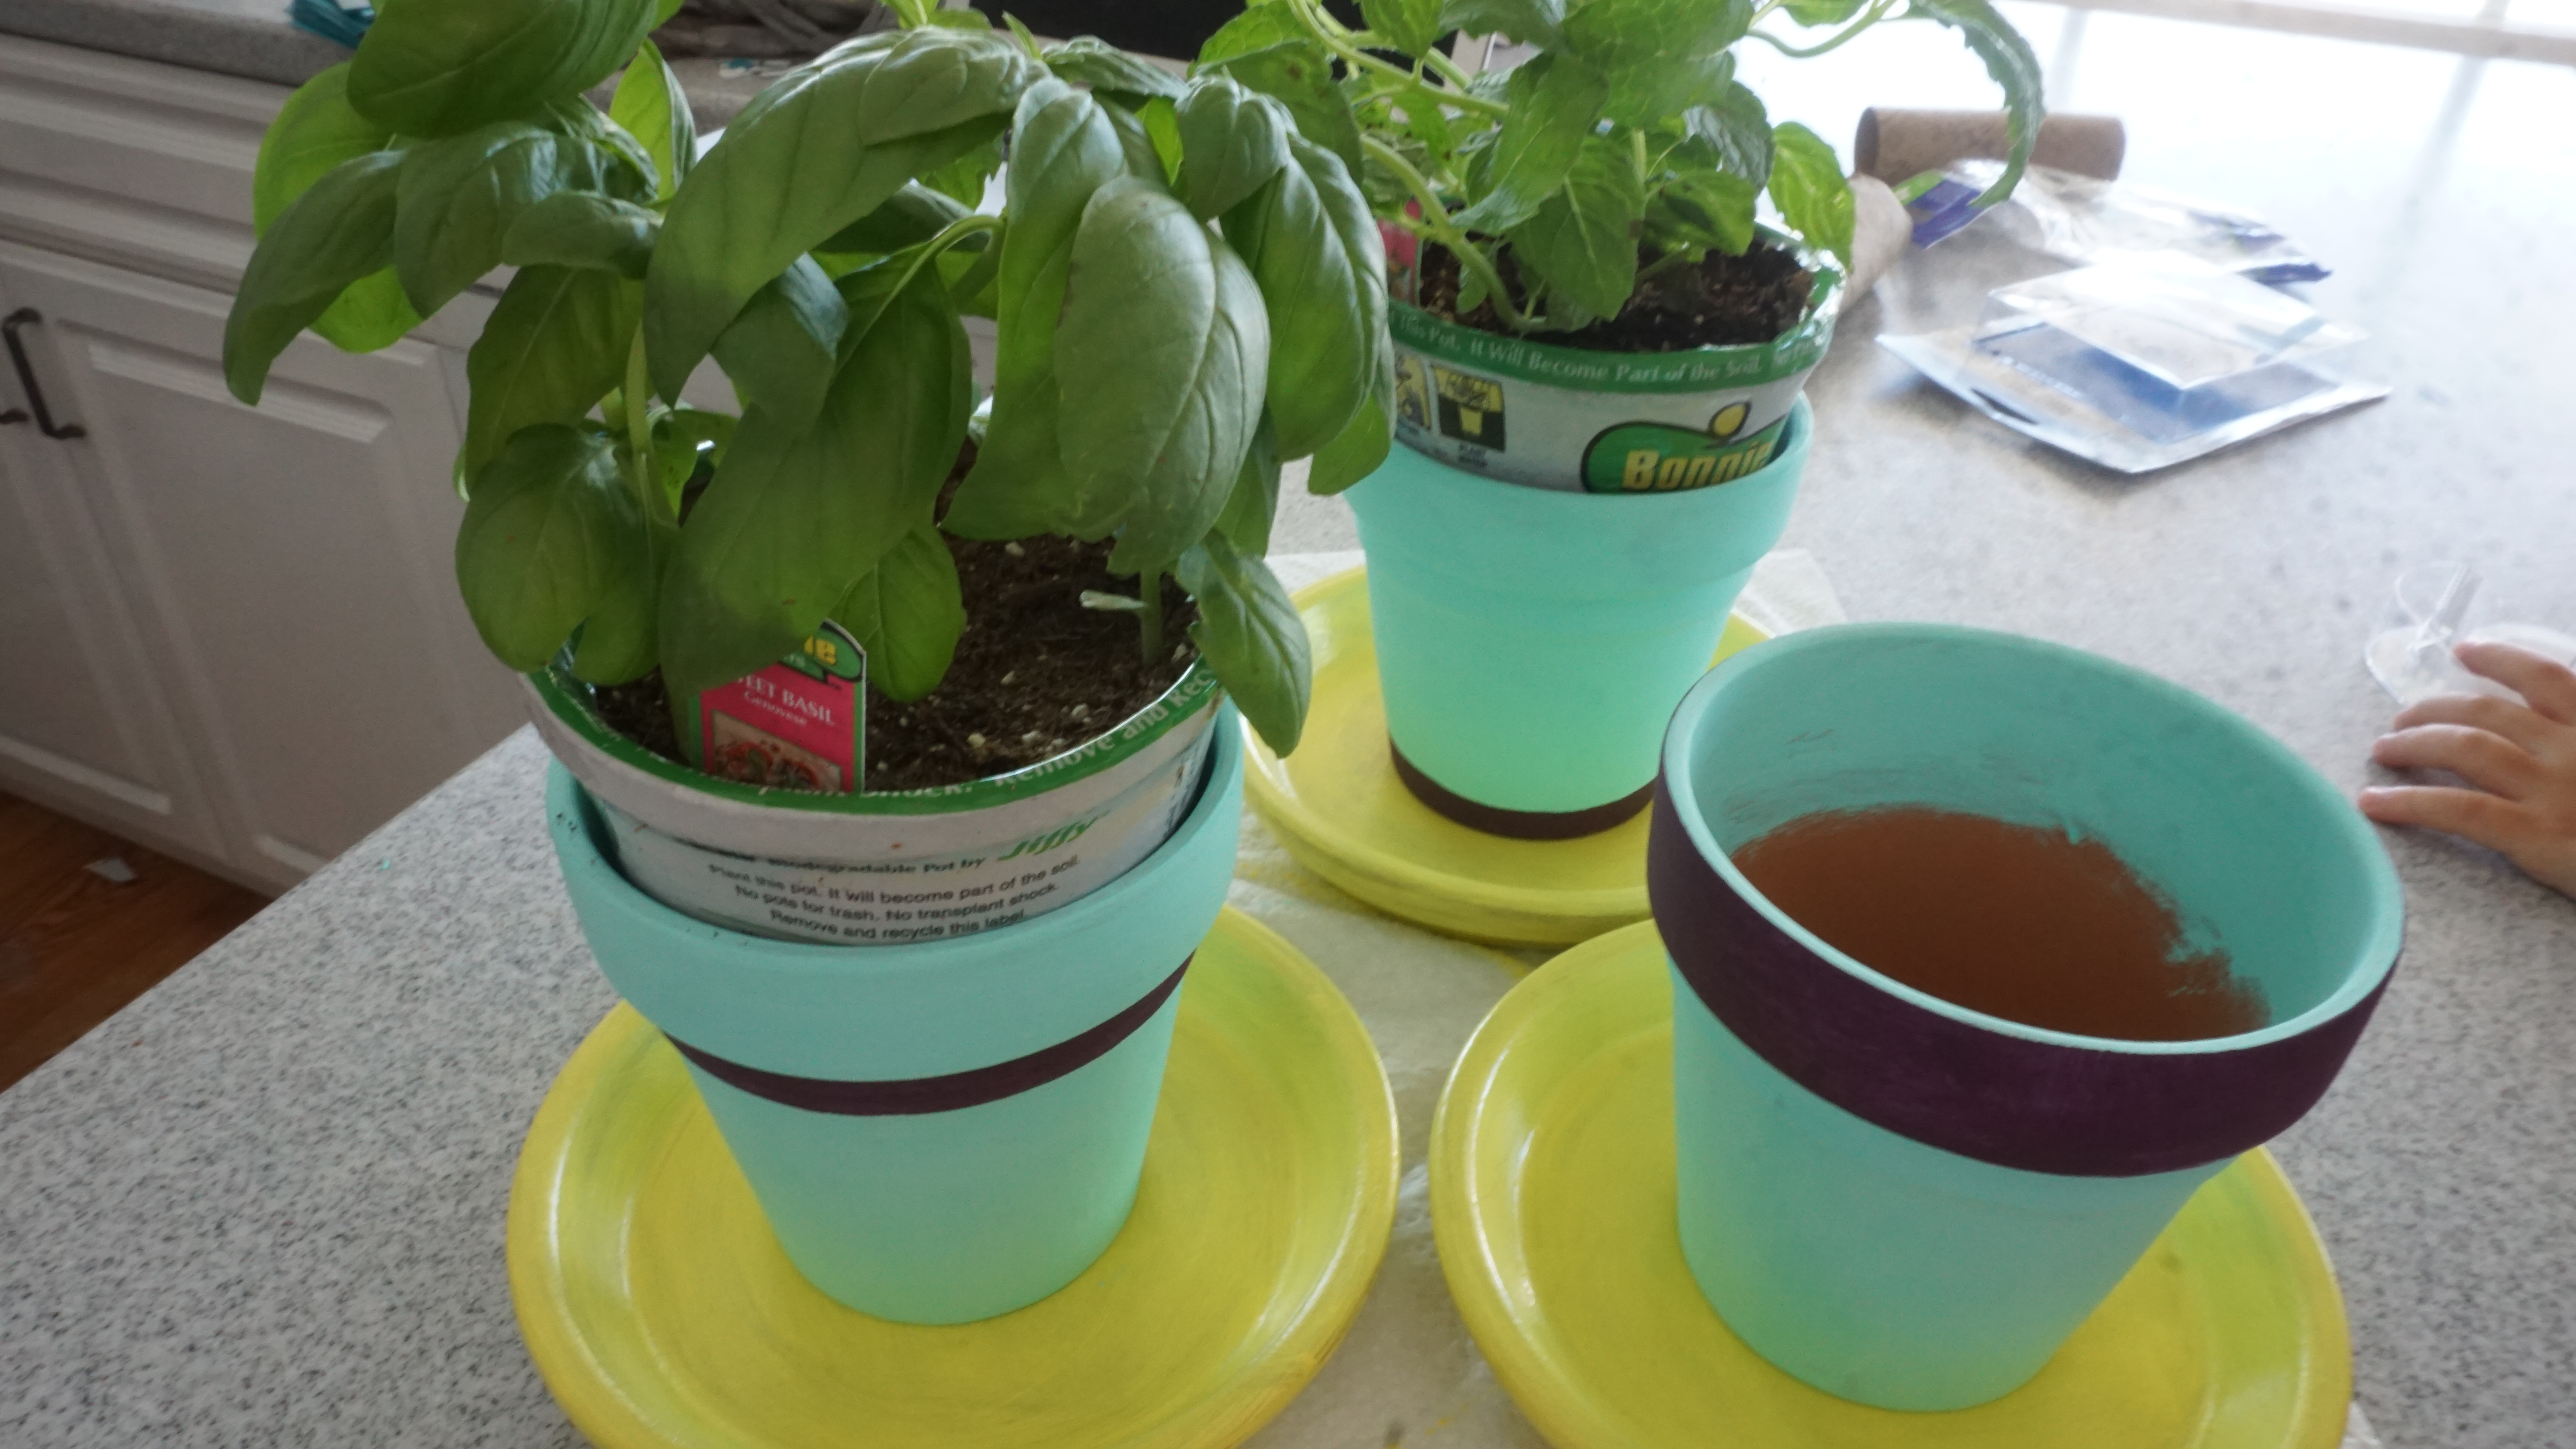
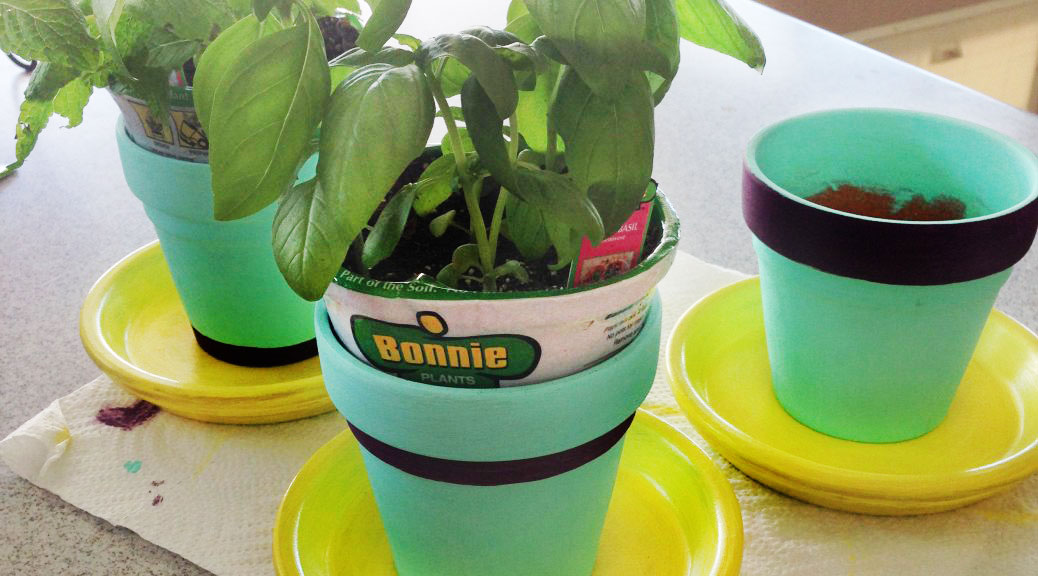
3 small pots and medium saucers (I like the bigger saucers to keep dirt and leaves that may fall off the plant contained)
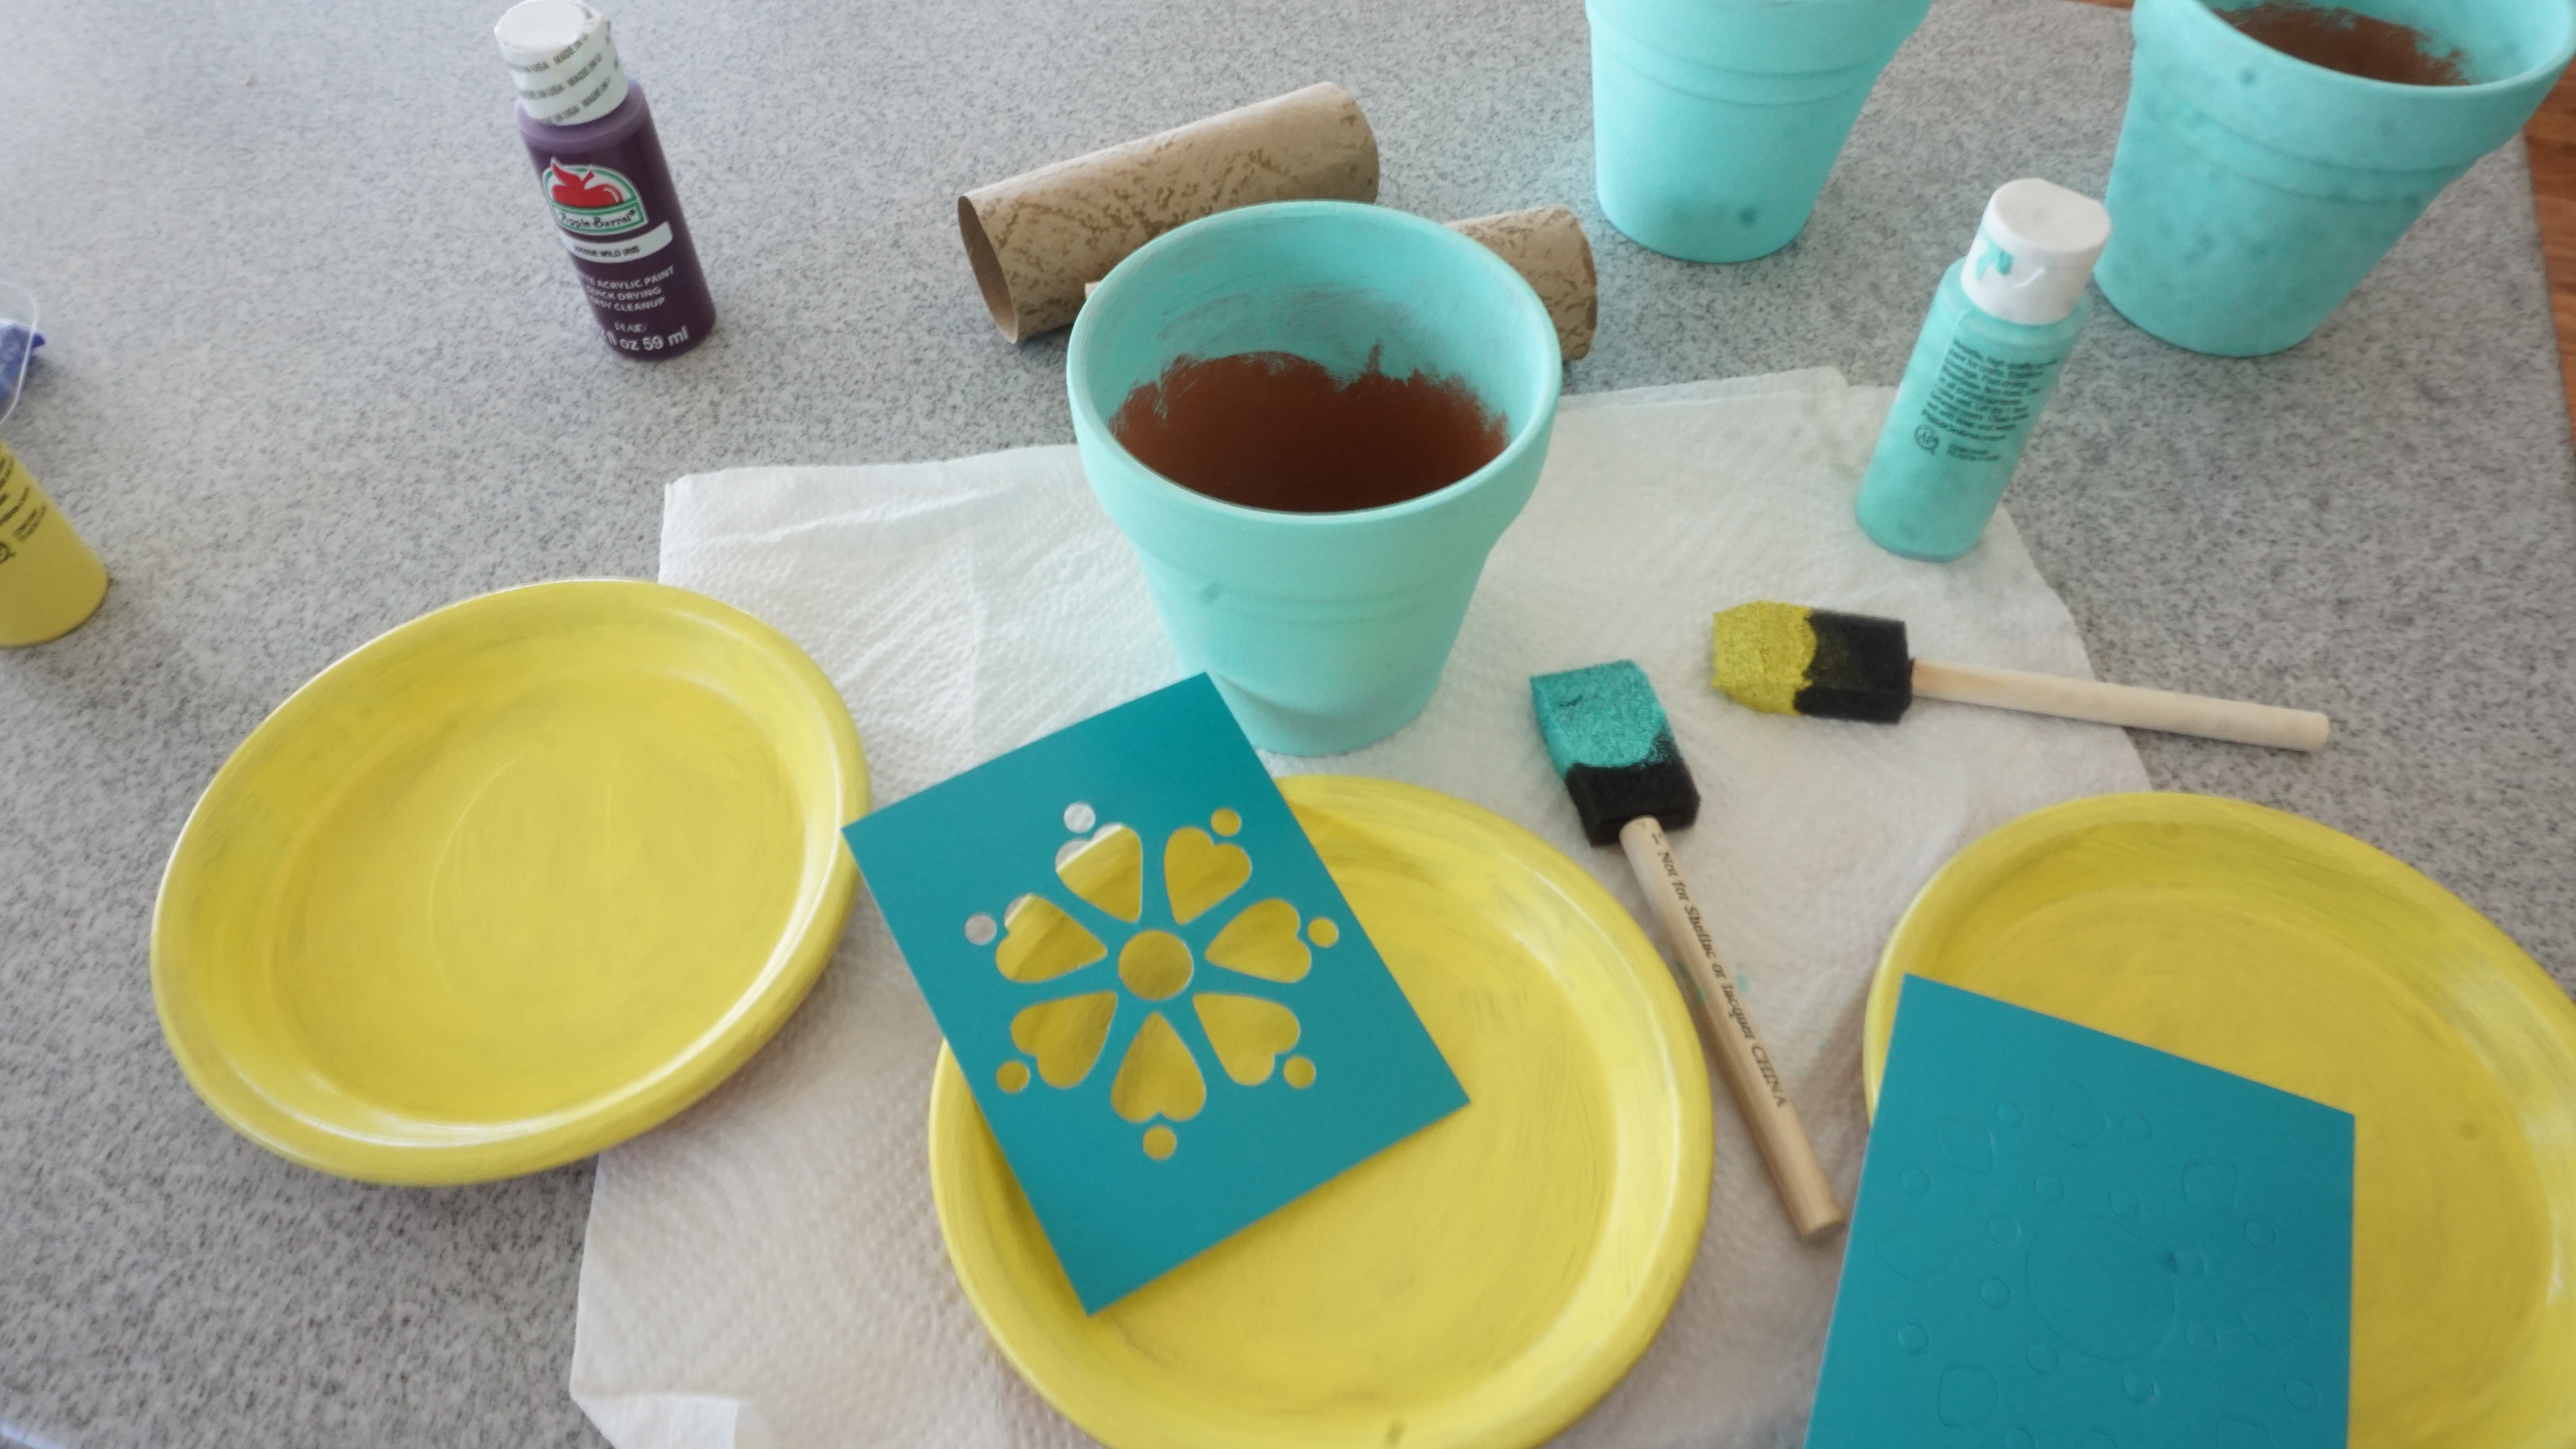
Sponge brushes
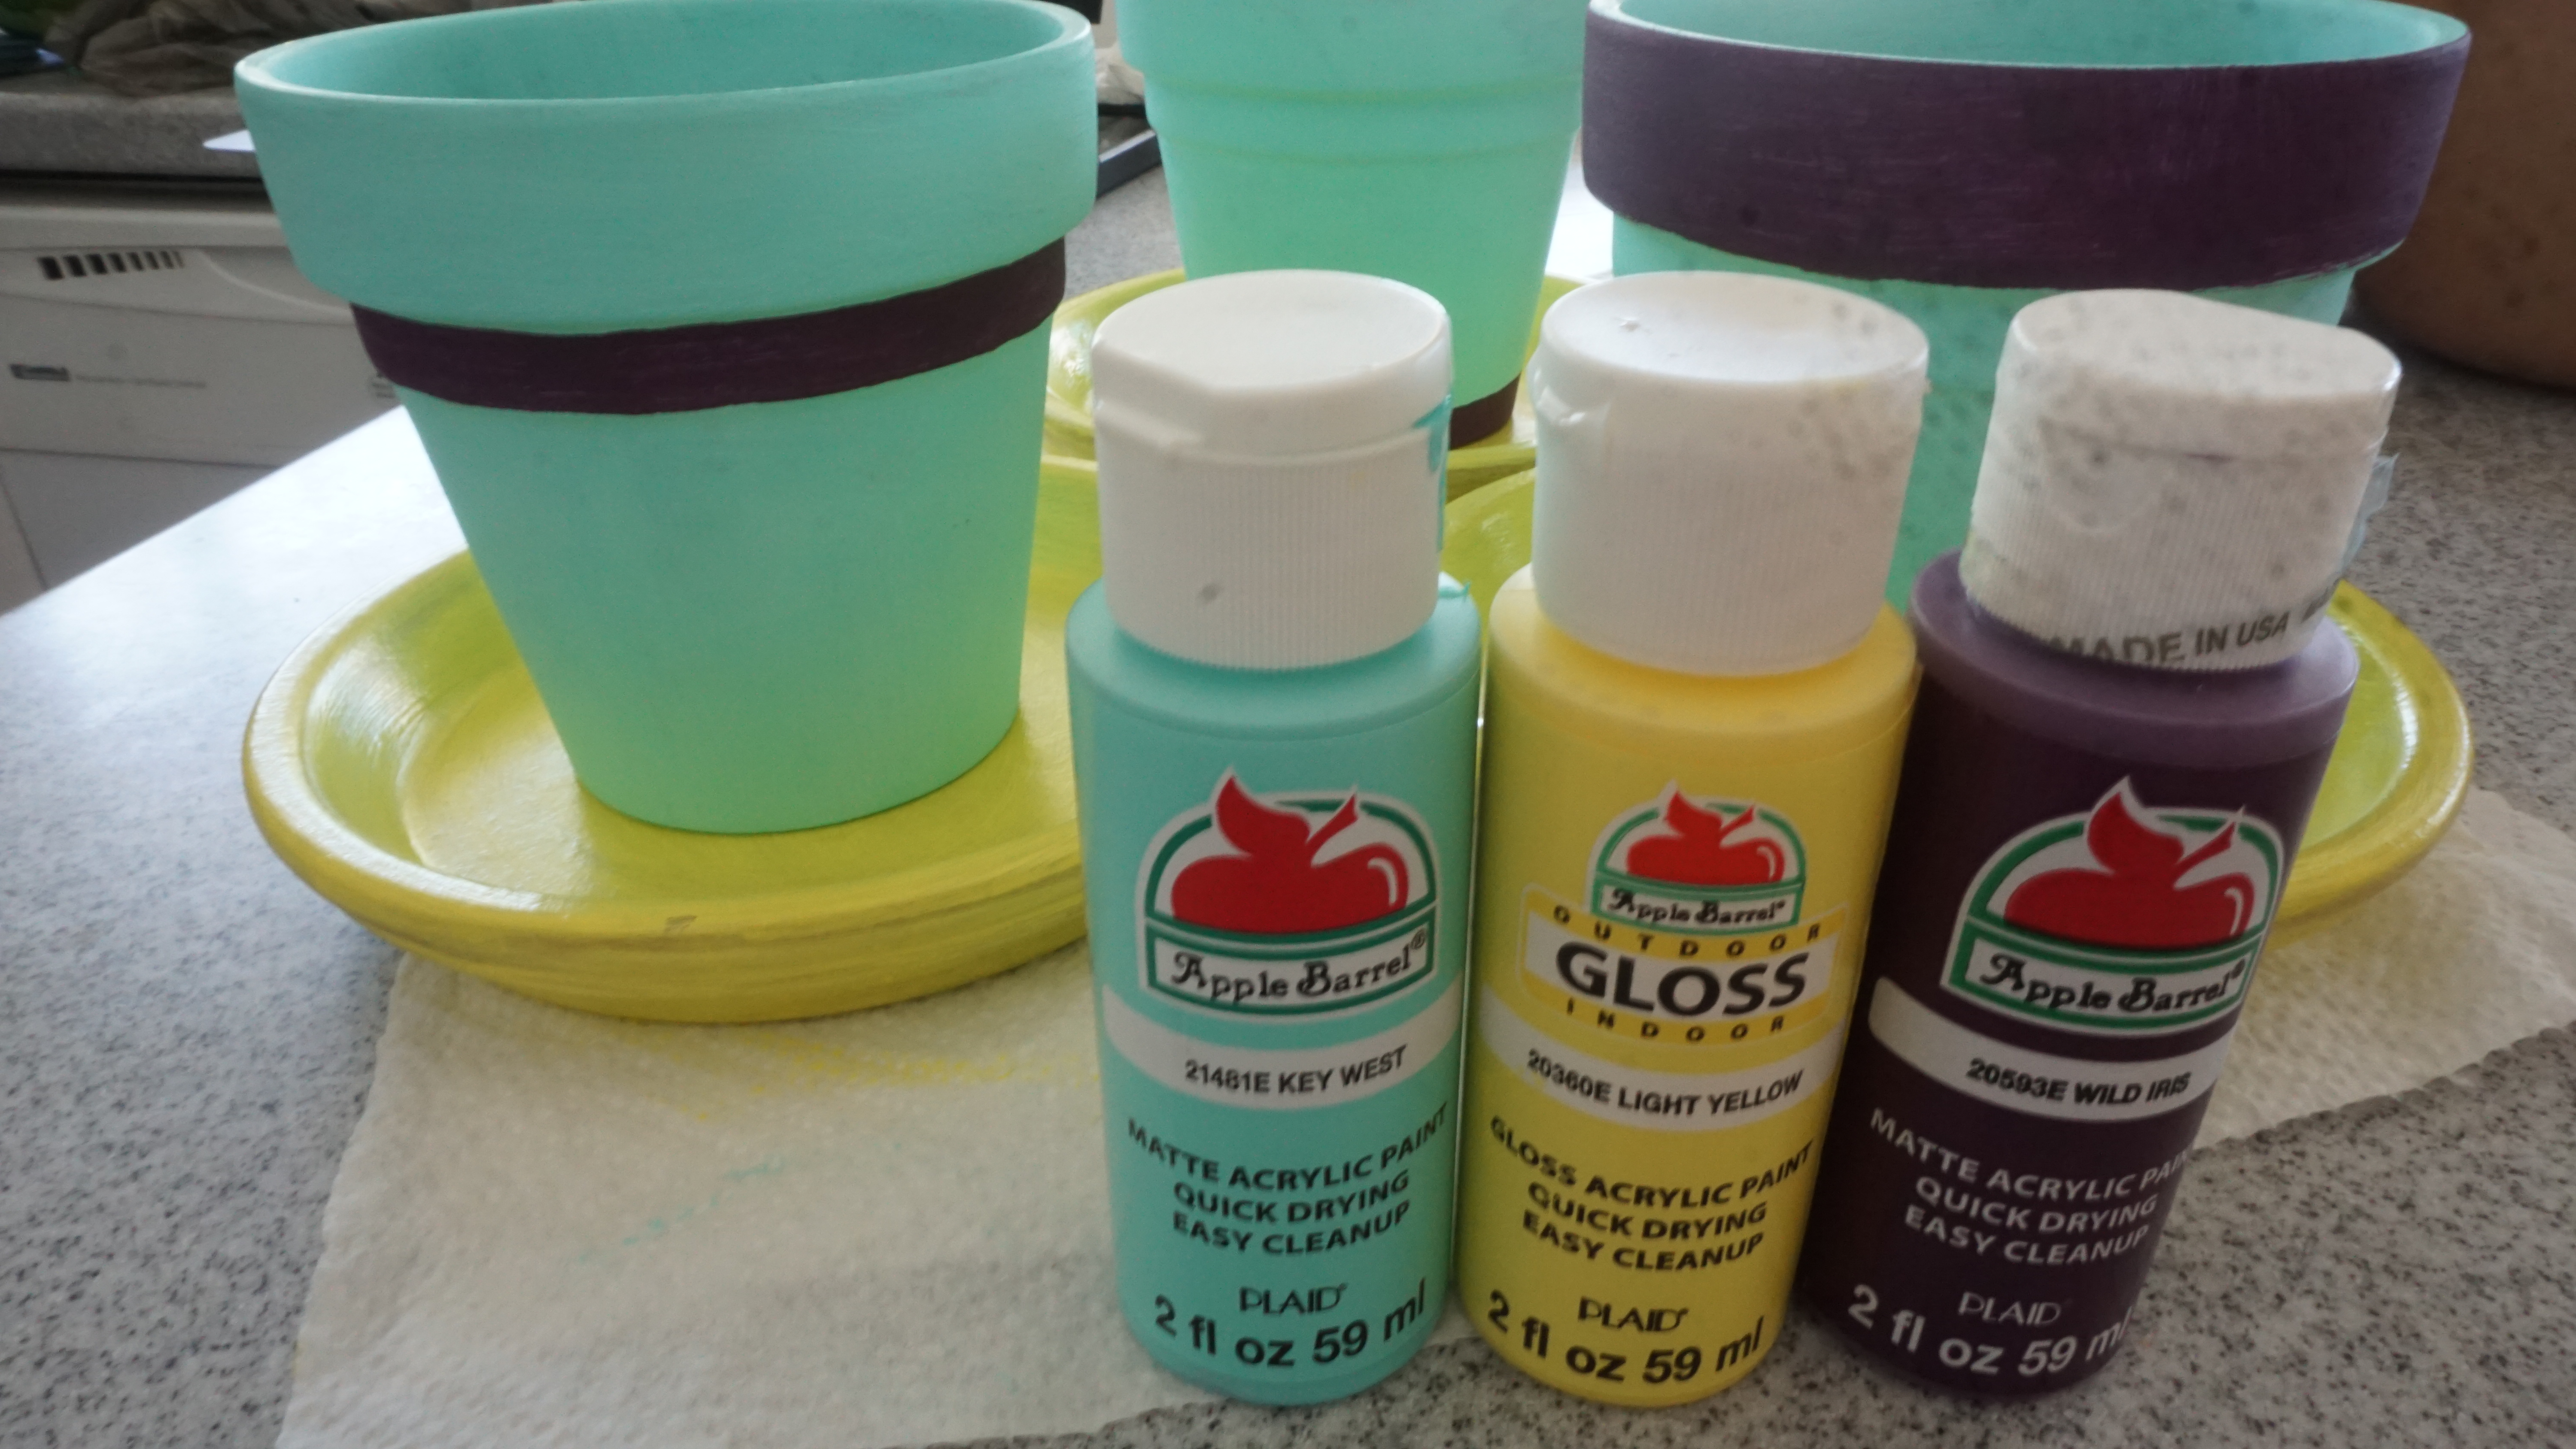
Acrylic paint
Clear acrylic sealer in spray can
Cardboard paper towel roll
*(I initially intended to use stencils to paint designs on the pots, this was leading me towards the fail page so that idea was scrapped quickly.. This was the original inspiration)
I set down some paper towels for inevitable spills and started to work during what I hoped would be a long nap for the kids. Obviously they woke up just a few minutes in and my 3 year old insisted on helping. Notice the tiny hands pitching in in the next pic 🙂
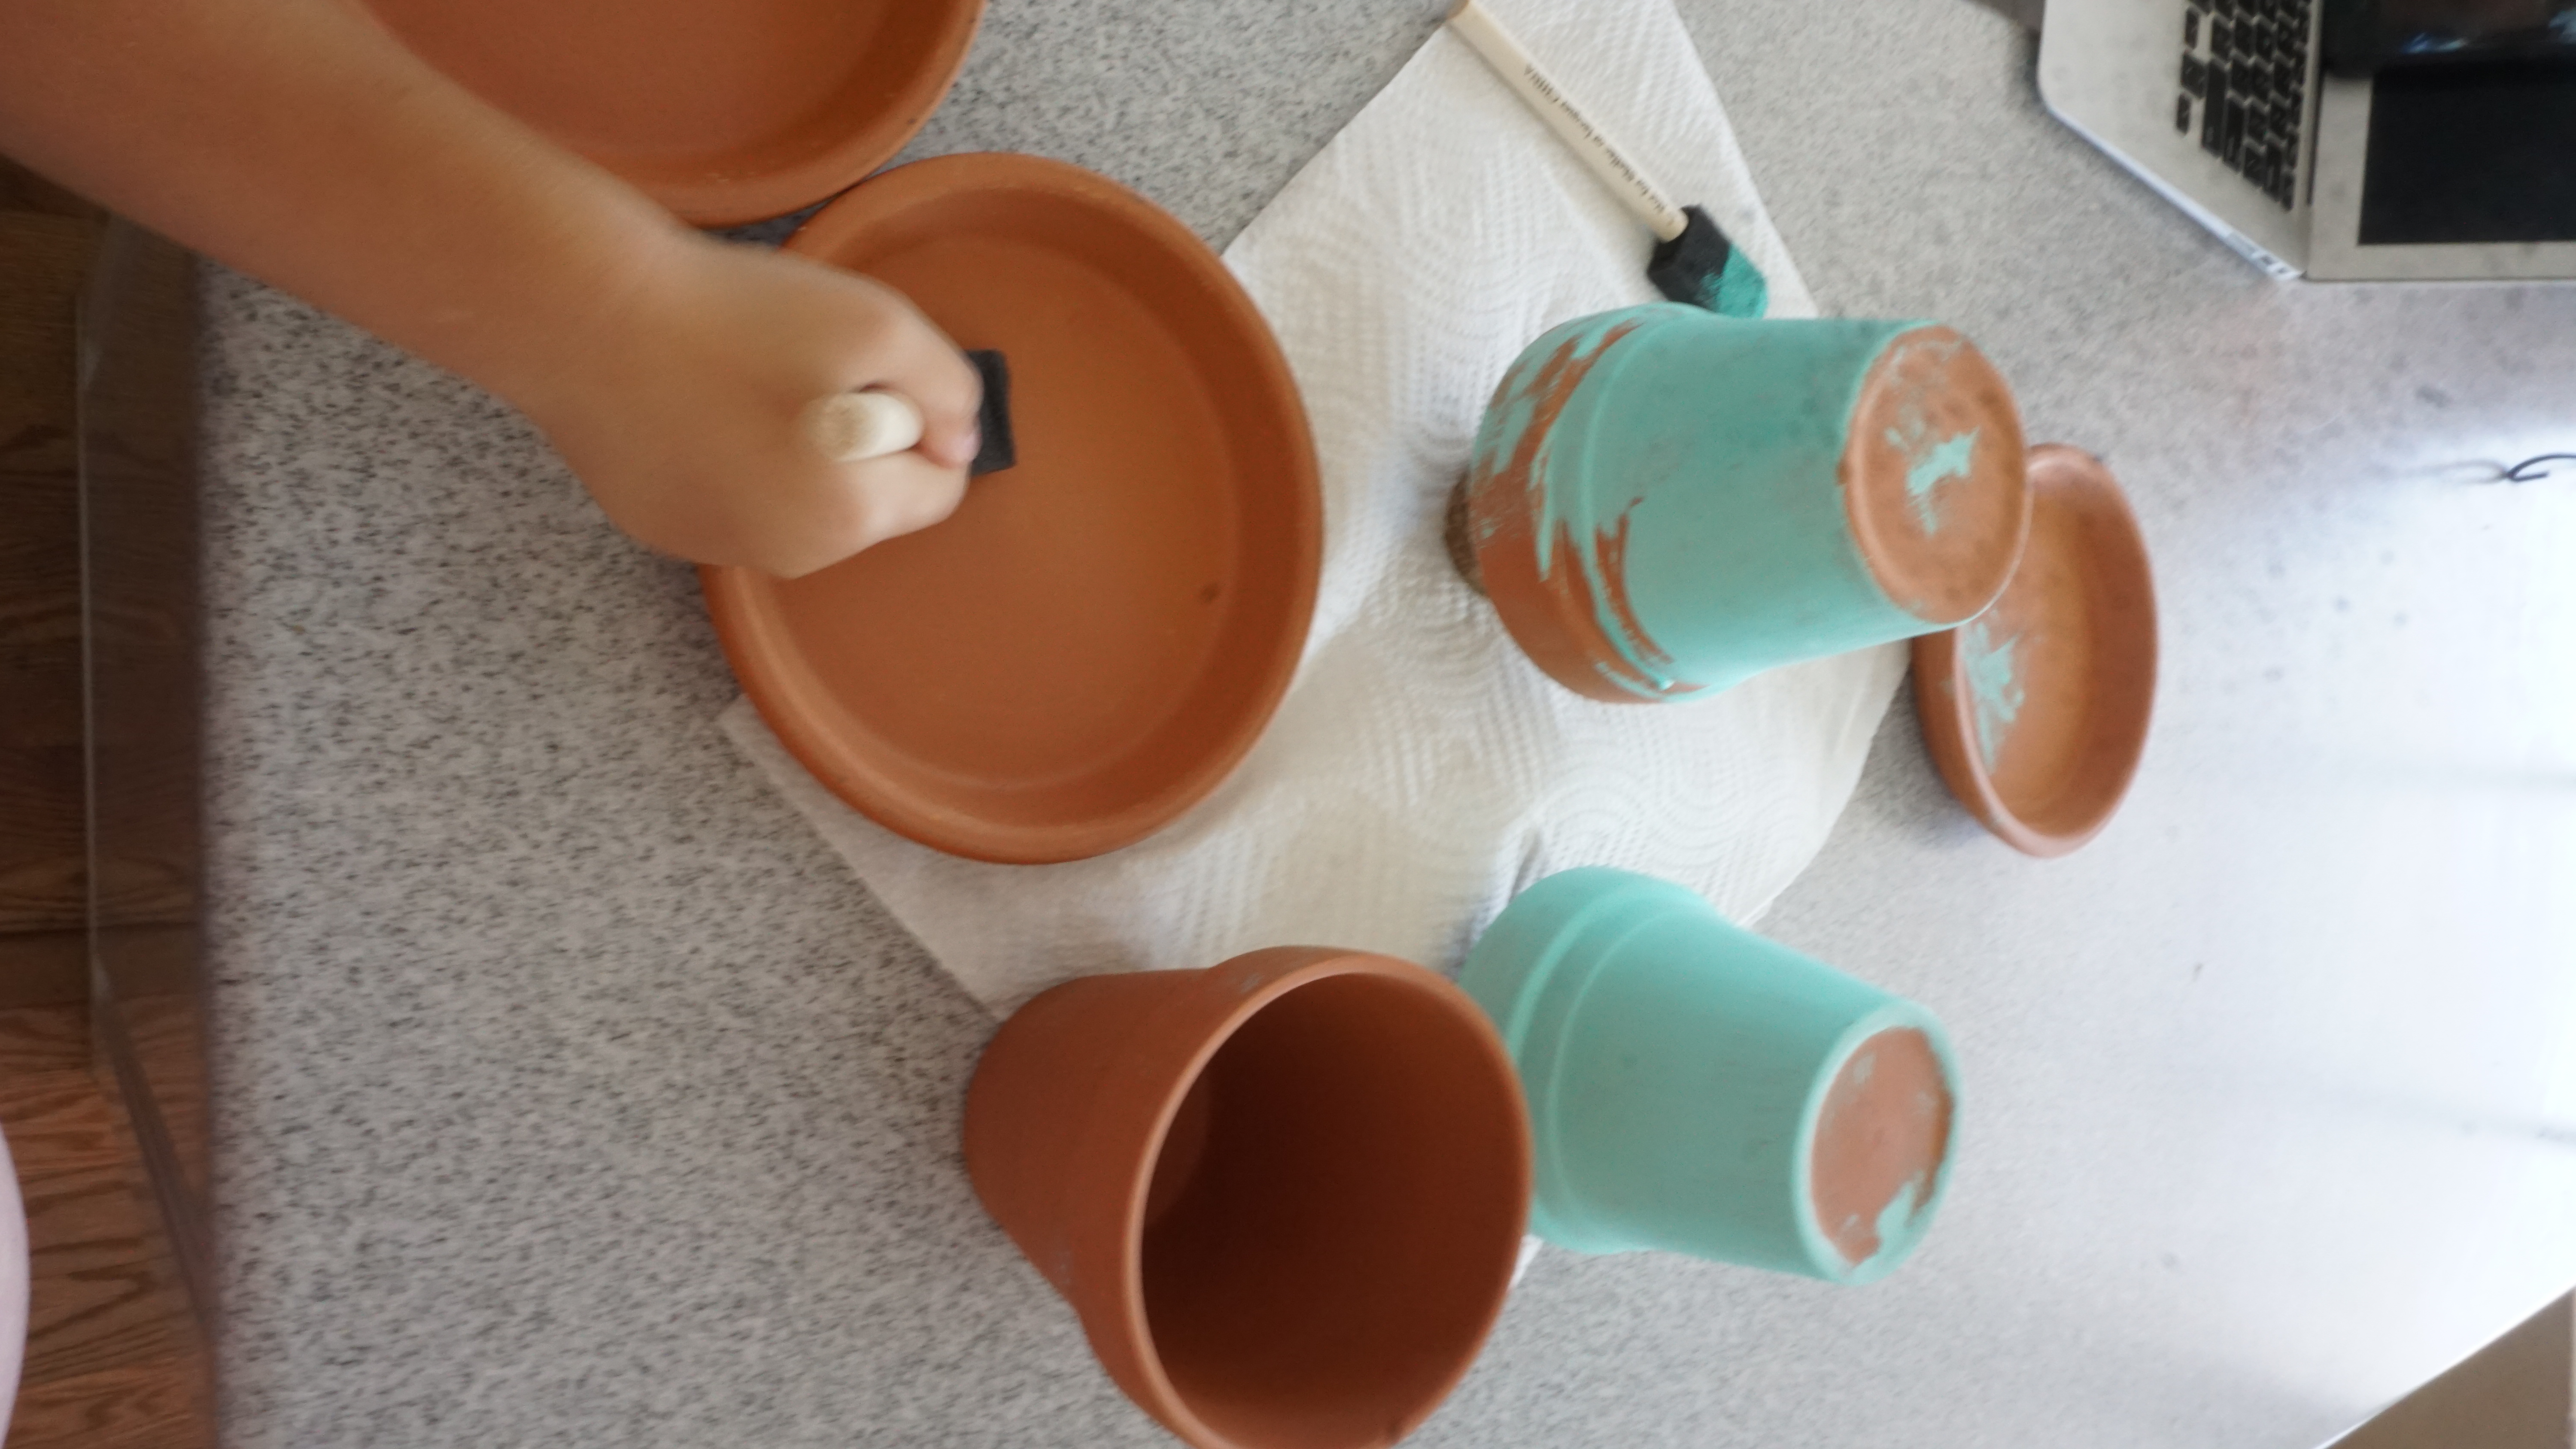
The blue and yellow needed 3-4 coats of paint to get the shade I wanted, the purple stripes looked good after just the first layer. I let the pots dry for 5-10 minutes between layers.
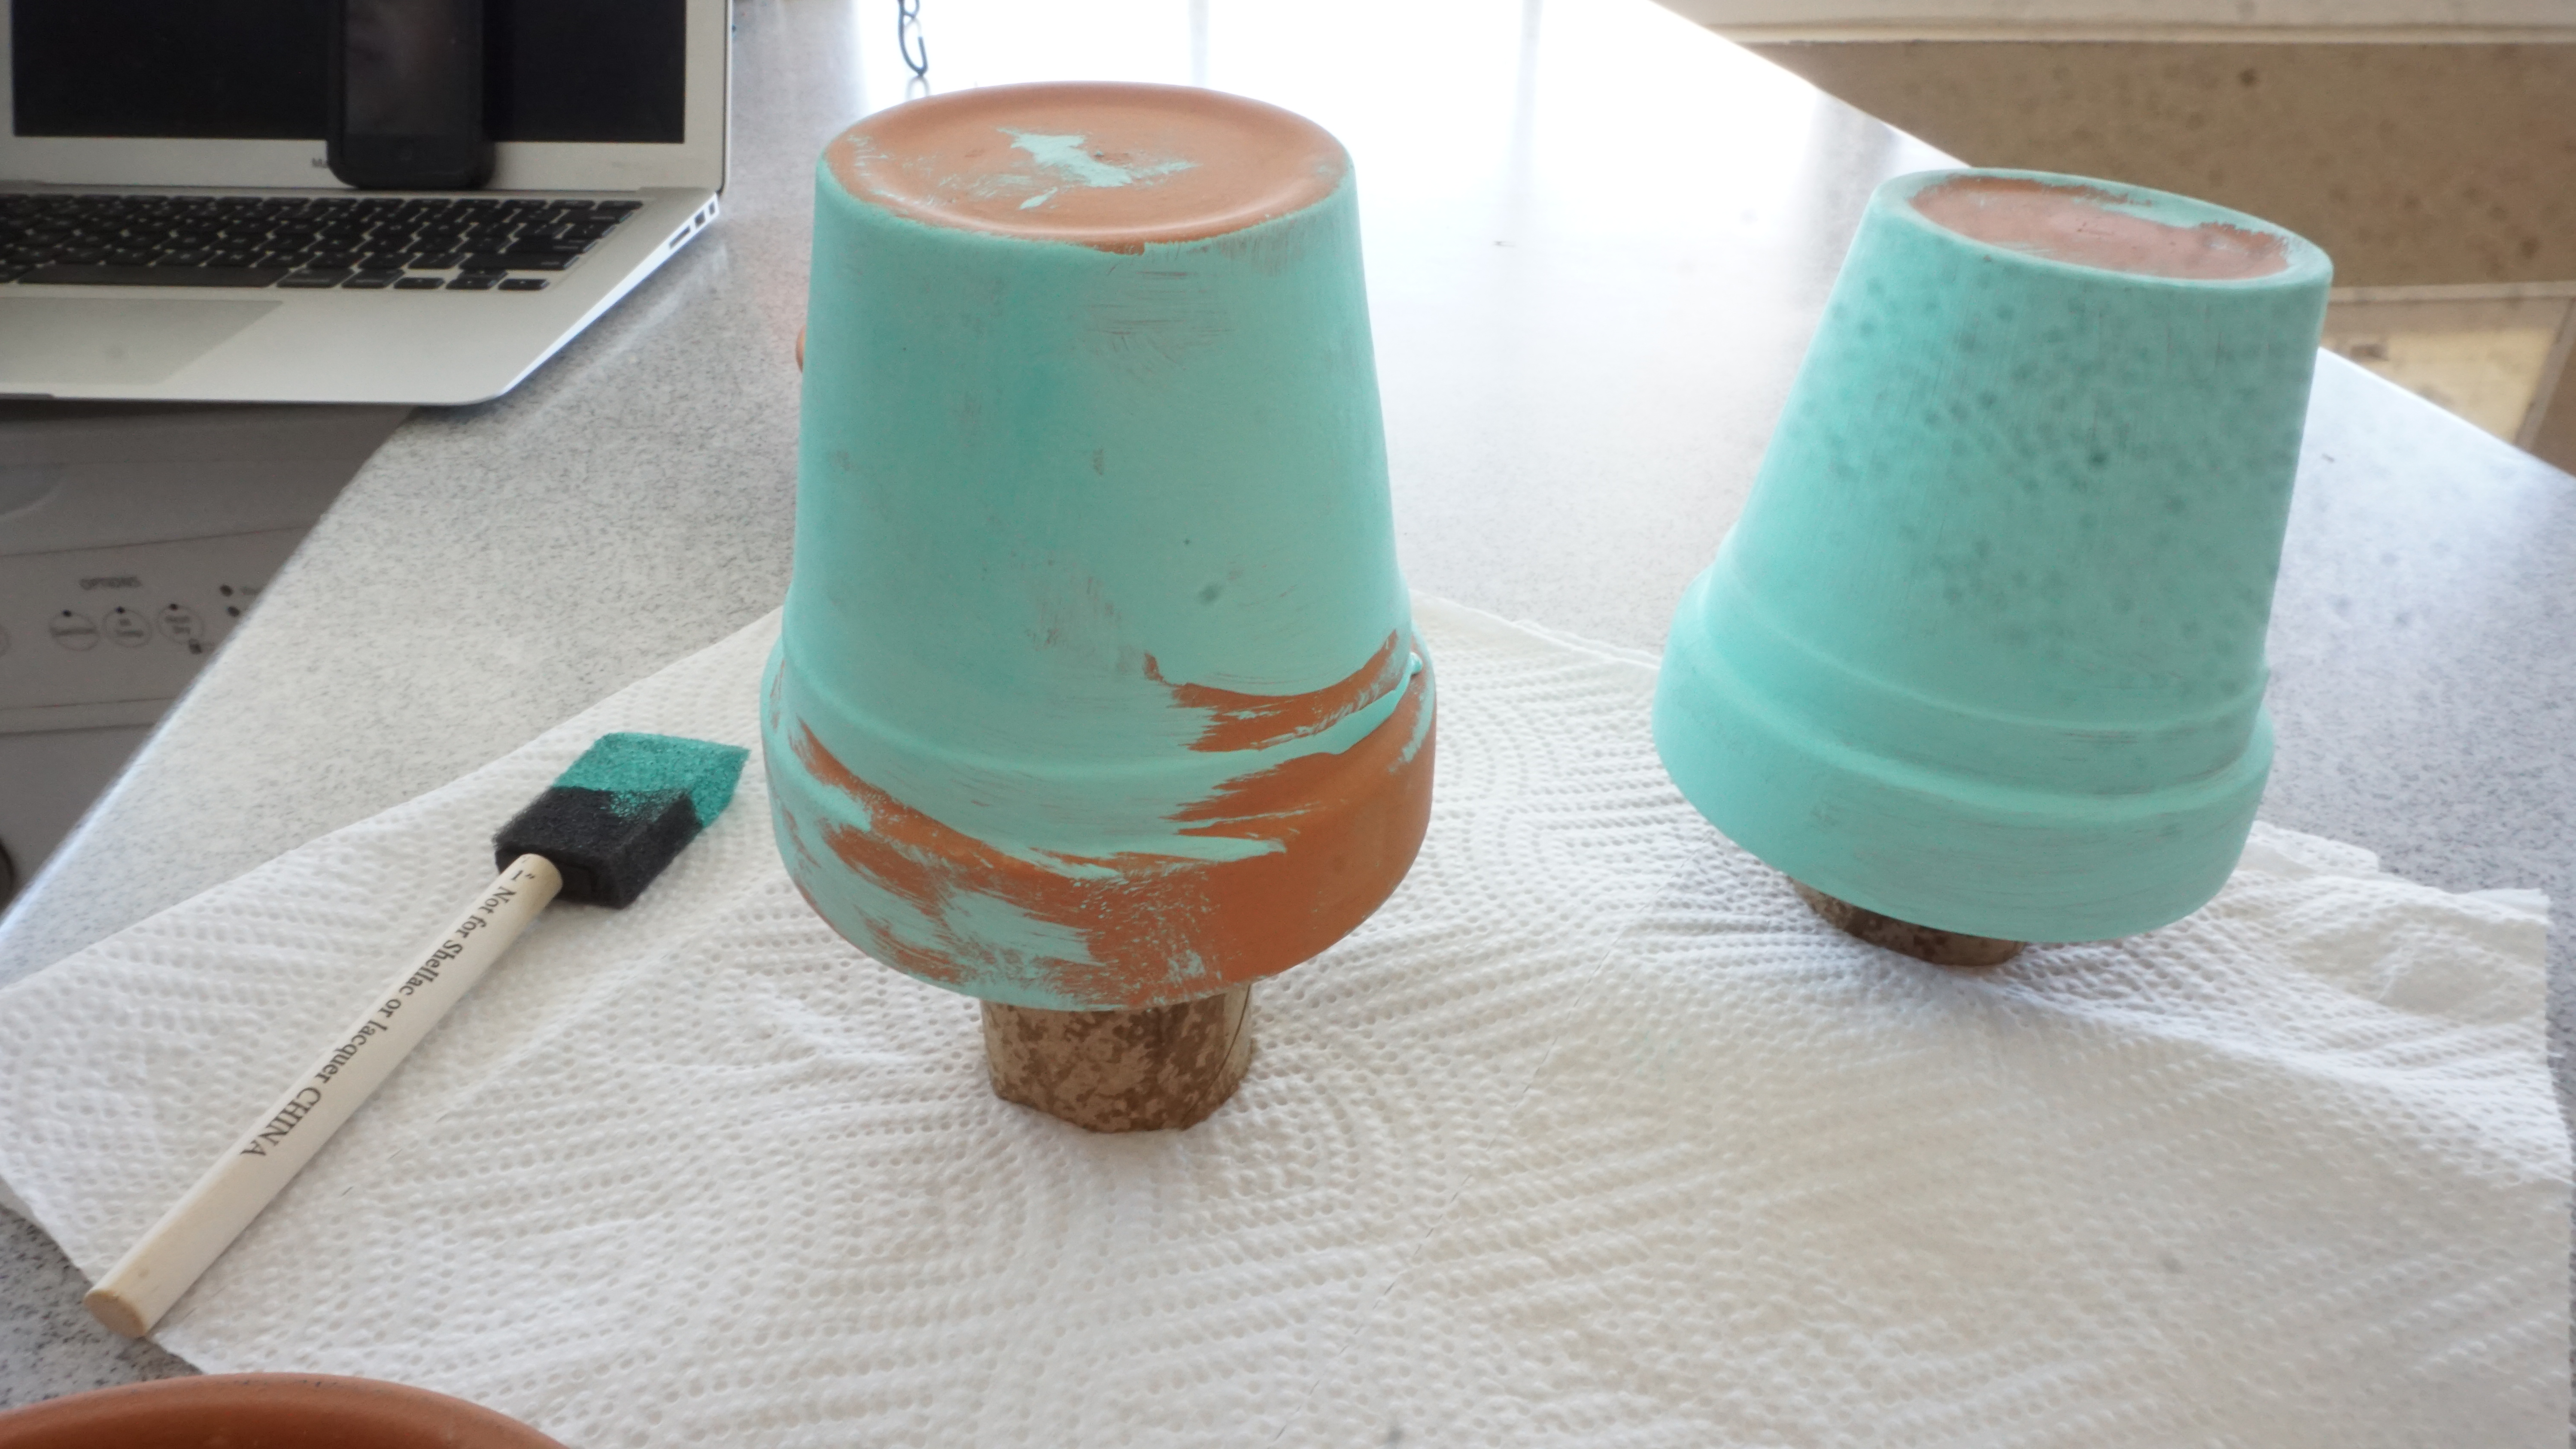
I used the paper towel roll cut in half to make bases to hold the pots upside down while i painted them. This made the process much faster and definitely cleaner.
Once the color was done, the pots/saucers were left to dry for 2 hours before I added the sealant. I did this outdoors, in a wind free area (VERY IMPORTANT TIP), and to make sure it was mess free i put the pot inside a cardboard box and sprayed it in there.
The sealant should be allowed to dry for a day before planting. This step is important to prevent the moisture from absorbing through the pot and causing the paint to bubble up or peel off.
Happy gardening!!!